Pages

Asus EeePC X101 Netbook , Powered by the "MeeGo" Linux Operating System!

When Asus launched the EeePC "project" it was a hit because EeePC gave users the ability to purchase low-end netbooks with lots of features for a very reasonable price (not all of them are cheap, anyhow). They consume less power, has a longer battery life, light in weight... perfect companion for our busy daily schedule.

Although I can't really remember the name but the first few EeePC came with an Chinese Linux distribution which was actually a mixture of applications/toolkits (you know the file manager was Konqueror and had several GTK written apps, etc).

And those were the "early" days of the powerful Mobile OS platform known as MeeGo.

It wasn't durable and ready at that time but now after several years the MeeGo mobile OS (funded by Intel, Maemo and Nokia) is looking pretty awesome and strong!. And as a result yesterday, Asus officially released one their latest EeePC netbooks called X101 which runs MeeGo as the operating system.

The catchy thing about the X101 is actually its price. When Google boasts about their Chrome Netbooks, Asus on the other hand has come up with "something" that has...


*. 1.33 Oak Trail  Intel Atom CPU.

*. 1GB of RAM/Memory.

*. Uses Intel GMA 600 GPU (since Intel has an open source friendly GPU designs... overall integration of Intel graphics are almost always better than Ati or Nvidia).

*. 10 Inch display area with 1024x600 resolution.

*. Wi-Fi

*. 2 USB ports.

*. Lithium Ion 28Whr battery (2600 mAh, 6-cell).

*. MicroSD card slot.

*. 16GB SSD drive as the main storage device.

*. Sizing at just 17.6mm, watch out Mac Book Air!.


*. Weights less than 1kg (950 grams to be precise).

and has a much lower price tag!. When considering all these decent hardware features, the X101 is gonna cost around $199 in US! (£150 in UK, but it's yet to be confirmed). There will be an option to pre-order it with Windows 7 (will rise the cost as a result - thank you Microsoft :P) as well. Anyway, I think by using MeeGo has a definite impact on the lower price without a doubt.


A little about MeeGo...


MeeGo's original name was actually Moblin. It's basically a separate Linux project under the supervision of Linux foundation and several other commercial companies such as Intel as mentioned earlier. The interface is optimized for mobile devices (you know, it's efficient and won't "waste" that precious "spaces" of these smaller touch/screens) and the UI is written using Qt toolkit. But other portions of MeeGo is written using the GTK+ and Clutter as well.

Although some portion of the OS (such as the Kernel few other parts) are released under GNU/GPL license but the whole Linux OS in general is an opensource project rather than a "true" GNU/Linux distribution. But the rest assured, it looks very very promising and totally free of charge!.

Will the X101 and MeeGo be able to impress the users??, well, I think when considering the price and the OS and the hardware features... heck ya it can! ;-).

Ubuntu Tablet ,The TENQ P07

Although still finding a decent Ubuntu Tablet PC is really hard despite the fact that Ubuntu is now, somewhat largely popular and all that. But I think unlike in the past with the introduction of the Unity desktop, which is optimized for touchscreen based mobile devices, within the recent future we'll few of (hopefully) Tablet PCs that are capable of running GNU/Linux from major vendors such as HP/Dell, etc.

Anyhow, few months ago (around December 2010) we heard a rumor about an Ubuntu Tablet PC called TENQ P07 (Chinese) which featured the, now "old" Ubuntu Netbook edition. Although it's been few months now, yet when considering the hardware details of the P07, if it's gonna be available any sooner, then I think it should be able to run Unity (Ubuntu 11.04 Natty Narwhal) easily.

Here are few of the main features...

*. 1.66 Intel Atom CPU.

*. 1/2GB DDR3 RAM.

*. 16-32GB SSD drive.


*. 10 inch touch screen (resolution is still unknown).

*. 1.3 MP front web camera.

*. HDMI output. 

*. Wi-Fi/3G and Bluetooth.

*. 2 USB ports (high speed 2.0).


Those are the main features according to GizChina blog post, which was "revealed" in 2011 January after seeing the positive feedback from the community, yea, like that was a surprise. And other factors such as weight are still unknown. But the actual testers say that the Tenq P07 booting time was almost instant (not to mention of the impressive speeds of the SSD drives) and has gravity sensors, etc as well.


Although at the time this was "shown" Canonical haven't released the Unity desktop, so as said it came with the old netbook edition. Again, it is more than capable of running Unity quite comfortably but since everyone knows the fact that Unity needs Compiz by default then the TENQ P07 better come with a reasonably powerful GPU with hardware accelerated 3D capabilities or else we can use the 2D Unity as a workaround :). But again, when considering RAM, etc I think it should be able to Unity without much of a hassle nonetheless.

Anyhow, it's been few months since it was first "rumored" and lets hope that the Tenq P07 Ubuntu Tablet PC is gonna hit the market pretty soon because it's a bit unfair to the GNU/Linux fans not to have a tablet PC of their own!.

Transformer TF101 - Asus Eee Pad That Runs Android Honeycomb 3.0!

For no particular reason (other than their excellent portability) for sometime now I've been searching for a Tablet PC that comes with a reasonable price + the possibility of running running GNU/Linux easily. Asus has been producing their "Eee" family personal computers for sometime now but their "Eee Pad" which resembles "Eee version" of Tablet PCs are something new to the consumers.

And to be honest, I haven't purchased it and has no idea whether it we'll be able to run GNU/Linux distributions, considering the fact that it runs the Android 3.0 Honeycomb... well, it might. Anyhow after reading few reviews and the official product page here are the main features and my personal thought about it.

Main Hardware Specifications...

*. Comes with the Nvidia Tegra 2 (a GPU that's especially designed to run on Mobile devices, performance + low power consumptions, etc) Dual-Core CPU that runs around 2 Ghz.

*. Has the ability to comfortably play HD videos around 1080p (resolution level).

IPS Panel, 178° wide view angle.

*. Display - 10.1" LED Backlight WXGA (1280x800) Screen, 10 finger multi-touch support + a scratch resistant glass (for all you "long fingernail" ladies :D).


*. 1GB of physical RAM.

*. Wi-Fi and Bluetooth 2.1 version.

*. 1.2 megapixel front camera and a 5MP back camera.

*. MicroSD card reader/HDMI output (+ audio output jack and a mic-in).

*. 5 Different sensors - G-Sensor, Light Sensor, Gyroscope, E-Compass and GPS.

*. Powered by the open-source Android Honeycomb version 3.0 (there might be an update available through Asus to the latest 3.1 version, but as usual, delays are expected) and Adobe Flash 10.2 support.

*. 16/32GB SSD (solid state disk) for storage.

*. Battery life of 9.5 hours!.

*. Weight - 680 grams.

But one important thing about the Transformer TF101 Android Honeycomb Tablet is, by adding a portable docking station (more likely a keyboard actually, shipped separately)... you can convert the TF101 Tablet PC into a light weight netbook!.
Have a look at the above screenshot. As you can see, the Tablet is fully integrated into the "dock" because by default the Tablet PC version has two "docking Latches". After integrated with the docking station, it gives you a physical QWERTY keyboard (obviously) but most importantly, this is not just a "keyboard" but it consist of ...


*. 2 USB ports (2.0 high speed).

*. 40 Pin standard battery charger.

*. Dedicated "Android buttons".

*. SD card reader to the right corner and since it has a powerful battery embedded to the dock itself, after attaching it with the Tablet, you should be able to expand the default 9 hours into an impressive 16 hours! (although these values may differ since these are just what the Asus claims).

And apart from the Android Honeycomb interface, Asus gives a UI of its own called Waveshare by using which you can access Asus's online services such as MyNet, MyCloud, etc with ease. And the Asus application Launcher is also embedded into the Honeycomb as well.

And as said, guys/gals this is not a review, because I haven't bought it or anything. But the reason that I choose to write about ... well it kinda impressed me with that Tablet PC and the "dock" thing :).

And if you're wondering about its ability to render HD videos directly into your huge TV screen, well according to Asus, TF101 can do it pretty easily, quoting...
"Powered by the NVIDIA® Tegra™ 2 dual-core processor, the Transformer browses the web at blazing speeds, providing a snappier response time and better performance when multi-tasking. Sporting a HDMI 1.3a port, the Transformer can connect to a HDTV and 5.1 surround sound system, delivering an enhanced multimedia experience..."
Although to be honest, Apple's iPad2 is not as impressive as its predecessor. Because even after Apple claiming about its GPU being, what 9x times faster was it?... still it can't even play HD videos of 1080p... just mirrors those videos. So in that sense the TF101 apart from its cheaper price when comparing with iPad2, it's pretty powerful.

But again, when it comes to the look-n-feel ipad2... oh it looks better, the TF101 looks a bit like came from back in the 70s!. Oh and that dock as I said has to be purchased separately (I think it costs around an extra $130 something). If interested, you can purchase the Asus Transformer TF101 A1 from Amazon :D.

Linux Kernel 3.0 RC1 is Officially Released!

Few hours ago, someone called Linus Torvalds :P released the first ever version 3.0 of Linux Kernel!, which took some long long time. Although before anyone gets too excited, according to Mr. Linus... this does not bring any new features. But that's not to say that the Kernel 3.0 doesn't bring anything new.

As usual, concerning hardware drivers ... to the 3.0 RC, they've added few GPU driver updates, bug fixes of VM, VFS cleanups, few ARM consolidations, AMD fusion and Intel platform enhancements and finally the support for Microsoft Kinect Linux driver are added (the notable ones).

So, if there are no "major" features available, then why the heck they released it?.

"I'm actually older than I look :)"...

Well... to quote Linus himself...
"We've been doing time-based releases for many years now, this is in no way about features.If you want an excuse for the renumbering, you really should look at the time-based one ('20 years') instead..."
Basically it took Kernel developers roughly around 14-15 years to jump from the version 2 to the 3. I guess that they just wanted to start with a stable "number" and move steady rather than adding lot of features all of a sudden and making things "complicated". 

Since the latest 3.0 version is at its RC (release candidate) stage... it should interesting which distribution/s has the courage to ship it with their OS and let user get a "taste" of this latest release of the GNU/Linux despite of all these "no new features" talks :). Oh, btw, you can download it from this official Kernel release page.

easyLife - Installing Proprietary Software in Fedora Core 15 Made Easy!

Unlike with our friend Ubuntu... Fedora Core follows few strict rules of her own. Although we can choose whether to install or not to install MP3 codec by default while installing Ubuntu (within the installer or after), yet with FC, we will never see them shipping anything that "smells": Proprietary.

So after installing Fedora Core 15, if you were wondering about how to install all those proprietary multimedia codecs which enable you to play almost all videos (including DVDs/Blueray, etc) and audios + Flash player, Nvidia/Ati GPU drivers, etc with ease, then you should install an excellent little application called "easyLife".

easyLife is actually a GUI front-end which uses the RPM Fusion repository (third party maintained repository with all the proprietary software for Fedora Core) and certainly makes your life more easier!.

Here are few of the main features...

*. Install all video/audio codecs.

*. Install multimedia players such as MPLayer, Kplayer, K3b (KDE's default CD/DVD burner), Totem, Banshee, Xmms, etc.


*. Install Java (both 32 and 64-bit versions).

*. Nvidia/Ati proprietary drivers (this is pretty useful since FC15 has Gnome 3 installed and it uses Mutter window manager which requires deeper hardware support from your GPU. And in comparison with "free" drivers... the proprietary ones almost always have better performances).

*. Few DVD ripping tools... are just a very few of useful features in easyLife to mention.

So, if you want to install easyLife in Fedora Core 15 (heck yea you want it :P), open your Terminal and enter the below command.
wget http://sourceforge.net/projects/easylife-linux/files/easyLife/3.0-0%20for%20Fedora%2015/easylife-3.0-1.noarch.rpm
su -c "rpm -Uvh easylife-*.noarch.rpm"
Enjoy!. 

How To Install Gwibber in Ubuntu 11.04 Natty Narwhal?

Gwibber is another micro blogging client for your GNU/Linux desktop. It integrates few online social services to its cool looking GUI (written using the GTK toolkit) and lets you control your micro blogging activities with ease. They recently updated to the latest version 2.3 which brings numerous changes/enhances to the application when comparing with the previous releases.

Although it doesn't support a huge list of micro blogging/social networks but major ones such as Twitter and Faceboo, Identi.ca, Digg, FriendFeed etc RO Supported nonetheless.

Main features...

*. Easy to use GUI with built in toolbar and icons, etc.

*. Search easily + supports saved searches.


*. Doesn't consume much of your GNU/Linux Laptop/PC hardware either.

*. It supports the D-bus protocol (a protocol used for communicating within application in GNU/Linux) thus other application can easily integrate it as a plugin.

*. Check for you spelling mistakes while typing.

*. Uses HTML for themes... easily customizable as well.

*. With the recent 2.3 update, now it has a multicolumn interface which enables viewing multiple feeds with ease.


These are few of its features mention, it comes with a lot more actually. Few days ago, a new update (daily build) is available through their PPA channel, if you use Ubuntu 11.04 Natty Narwhal (10.10 and 10.04), then you can install Gwibber by entering the below command in your Terminal.
sudo add-apt-repository ppa:gwibber-daily/ppa
sudo apt-get update
sudo apt-get install gwibber

How To Extract ".deb" Packages in Fedora Core?

Have you ever wondered about the difference between automated installer (.exe file in Windows) and an archive?. The simple answer is, they're both actually archives!. Although there few more differences. For instance, in MS Windows whenever we install a software using a wizard (setup/installer) what it basically does is, it just extract the content into the predefined folder/path.

This is also what an archive does. But an installer goes further by adding registry entries (the "brain" of Windows OS) automatically which is something that an archive won't do. But still this resembles the close relationship between those two "extractors".

This is also true in GNU/Linux environment as well.

For instance, whenever you read a ".deb" (created by Debian team) or ".RPM" (created by RedHat team, not a "pure" archive as .deb, still it's kind of an archive) extensions using your archive manager in Gnome or Qt/KDE desktop, inside of these files you'll see a list of others files.

So, if you can manually put/extract these files using your archive manager to their defined locations, then it is the same thing as double clicking on them and installing.

Although not to say the truth that extracting a .deb or .rpm file with hundreds of other files in it... well it ain't fun for sure :P. So we should respect these extensions and worship... what the heck am I saying.. back to the story.

I'm better rpm!.... shut up deb! :)..
All I'm just saying is that (especially for the ones who are new to GNU/Linux... don't feel bad for yourselves, seriously, I'm not expert either!) since everybody knows that both .deb and .rpm are competing against each other, still, you should not think that extracting .deb files in GNU/Linux distributions that "love" RedHat "touch" such as Fedora Core will mean the end of your OS, you know crashing and stuff.

Since they're actually both archives (in a way), if you find a program that has been "packed" with the .deb extension, still, you can try reading it in a distribution that rely on the the .rpm format instead of .deb, you might even be able to run it (if you have it's dependencies installed, that is).

But in Fedora Core, by default, you cannot read .deb files. But fear not my friends, there is a separate program for that called ar. As said before .deb format actually is a pure archive format that uses "ar" as its "engine".

So all we gotta do to extract .deb files in GNU/Linux distributions that uses .rpm by default is to install our little "ar" friend. "ar" actually come as a part of the GNU Binutils package (a pack which contains few programmer's tool)

In Fedora Core 15 or latter versions, open your Terminal and enter the below command to install "binutils".
su -c "yum install binutils"
So, whenever you download a .deb package in FC, etc open your Terminal and use the below command to extract the content.
ar p mypackage.deb data.tar.gz | tar zx 
Then you can begin the painful process of manually copying the content to its location/s :). Hope this helped.

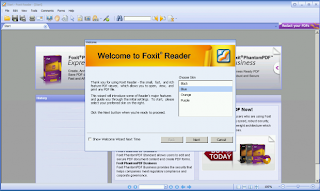
Foxit Reader 5 Is Released - GNU/Linux is Now Officially Supported!

Although there's nothing wrong with the default PDF reader from Adobe since it comes with a lot of features by default. Yet, if you have an old PC/Laptop, then reading a PDF file with decent amount of images, etc will require a lot of system resources from your PC (at lest in my personal experience anyway).

This is where the tremendous success of Foxit reader comes from. The reason I said "tremendous" is because, not that long ago, if you search in Google the word "pdf reader" then the first site that used to sit at the top was the Adobe's official PDF reader. But whenever you search this phase now in Google, Foxit website is at the top, beating Adobe, the original creator of .PDF extension!.

And the reason for its popularity is because it loads fast, has almost all the features Adobe has to offer and most importantly, it uses significantly lower amount of system resources of your PC/Laptop.

And for the first time ever, now there's even a version for GNU/Linux too!. This is the first time ever it was released for GNU/Linux and in comparison with the MS Windows version, it has lesser amounts of features right now, but trust me, it's way way better than the Gnome's default PDF reader and many others without a doubt!.

Main features of the version 5 (Windows version)  


*. Totally new look-n-feel with new icons.

*. Comes with built in themes (Blue, Yellow, etc) the users can change from.

*. Tabbed interface.

*. Screen-Split feature for better PDF viewing/comparing documents, etc.

*. Once installed, now Foxit 5 make sure to Preview PDF attachments in Window Outlook.

*. Thumbnail previews within the file manager (explorer) in Windows.

*. Faster search with PDF files.

Although these are just a few of new features to mention there a lot of others that I didn't write down since most already familiar with it. As said the GNU/Linux version has lesser amounts of features... yet it's already a complete PDF rather than the useless Evince (document reader).

Here are few features of the Linux v 1.1


*. Multi language support.

*. Anti-aliasing Fonts.

*. On-screen dictionary integration supported.

*. Enhanced toolbar with buttons such as : Zoom-in/Zoom-out, back/forward/Print, etc 

*. Search.

*. Automatic scroll.

*. Take Snapshots/Screenshots... are again few to mention. 


Recommended System Requirements for Windows

    1.3 GHz or faster processor.
    64 MB RAM (Recommended: 128 MB RAM or greater)!.
    52 MB of available hard drive space.
    800x600 screen resolution.

In GNU/Linux by default the application will consume less than 15MB.

And for all these features how much do you have to pay?, well that's the fun part. It's completely free!. For MS Windows users, you can download it from this page. You can download the GNU/Linux version form this official Foxit for Linux page.

How To Install Rhythmbox in Ubuntu 11.04 Natty Narwhal?

Anyone who uses Gnome desktop these days surely have heard about Rhythmbox even if your distribution does not come with it. For instance, in the past it was actually Rhythmbox which used to be the default audio handling application in Ubuntu. But then Banshee came around and impressed Canonical which ultimately replaced Rhythmbox.

Although in the recent past Banshee and Canonical had a little, something going on (in a bad way :) ), I even thought that Ubuntu will completely remove Banshee from their official support... but they've decided to stick to it and as a result Banshee is the default music player in Ubuntu 11.04 Natty Narwhal.

Rhythmbox is a GTK written GUI which uses the Gstreamer front-end and according to its developers themselves, it tries to "follow" the work of iTunes. Although almost all knows about it and the features... yet let me give you a simple list of its features nonetheless.

*. Music browser which is pretty easy to use and lets you manage a large collection of music libraries with ease.

*. Playlist support (embedded).


*. Plays MP3, AAC, Vorbis, WMA, Flac... basically, anything that Gstreamer multimedia framework supports, Rhythmbox can play.

*. Internet radio support (Last.fm, etc) + live streaming.

*. Few built in audio visualizations.

*. Transfer music to and from iPod, MTP, and USB storage media players.

*. Rip/Play and burn Audio CDs.

*. Podcast downloading.

*. Preview and free download (legal) music files from sources like Jamendo and Magnatune.

These just a few to mention. Since it support plugins, you can expand its features by simply adding plugins as well. If you use Ubuntu 11.04 Natty Narwhal and want to know how to install Rhythmbox, then open your Terminal and enter the below command. Enjoy!.
sudo apt-get install rhythmbox

gekosMac (GTK Theme) - Make Ubuntu 11.04 Natty Narwhal Looks Like Mac OSX!

It's no secret that GNU/Linux community, Gnome developers (especially) are admirers of Apple's Mac OS usability. Although to be honest I haven't used it, but from the screenshots and few videos I've seen, Gnome desktop 2+ version (including the Shell as well) resembles Mac OSX look-n-feel heavily.

And when considering Unity's application dock, windows title buttons to the left-side, wallpaper etc and even Mark Shuttleworth said when asked whether he'd prefer iPhone over Android phones, he said, "Yes!"... so Natty Narwhal is also much closer to OSX.

In that sense if you want to make your GNU/Linux Laptop completely looks like a Mac OSX, then all you gotta do at this point is to install a theme!. Well then you might be interested in a GTK written theme for Gnome called gekosMac.

As you can see with below screenshot, in resembles Leopard and the creator advices you to install Nautilus elementary + the Faenza Mac icon theme after installing the main gekosMac GTK theme as well. Lets install the theme in 11.04 Natty Narwhal first.


1. Open your Terminal and enter the below command.
sudo apt-get install aurora
sudo apt-get install gtk2-engines-aurora
2. Use the below command to install Nautilus Elementary (remember, this is not necessary, but Elementary looks more like the OSX fm).
sudo add-apt-repository ppa:am-monkeyd/nautilus-elementary-ppa
sudo apt-get update
sudo apt-get upgrade 
also make sure to restart Nautilus. To do that, use the below command.
nautilus -q
3. Now the final part. Lets install the FaenzaMac icon theme. Use the below command for that.
sudo add-apt-repository ppa:tiheum/equinox
sudo apt-get update
sudo apt-get install faenza-icon-theme

If you don't like the buttons on the panel, then the developer advices that you do the following (quoting himself)...

#######IF YOU USE UNITY#########

Look at buttons in panel. You do not like this. You can fix that!!!!

0) All that is written to it except 4 step
1)You need to open terminal and write command

gksu nautilus

2)than go to /usr/share/themes
3) Backup Ambiance(copy to some place or add to archive)
4)extract Ambiance.tar.gz that you download
5)Replace folder that you extract from archive (delete Ambiance at /usr/share/themes and copy extract Ambiance theme to them)

THAT ALL Then Logot and login :)

That's it. Now you've successfully converted your Unity (also works on LinuxMint as well) to Mac OSX!. Enjoy.  

MediaInfo - An Advanced Audio/Video Tag "Reader" for GNU/Linux and MS Windows

If you have installed the proper codecs in MS Windows and GNU/Linux, the operating system can read Tag information which holds information such as Artist/Title/Album-name... + other various information such as bit rate, resolution, etc but it doesn't necessarily mean that they'll always display those information for you by default because...

For instance, in MS Windows when you bring your mouse pointer towards a MP3 file, then even without you having to go for its properties the OS displays information such as Album/Artist/Year, etc. But this does not work with all the codecs and container formats.

Say that you have a .mkv multimedia container format with H.264 video codec and AAC audio files are in it, then even after installing the proper codecs Windows is unable to display advanced information such as with MP3 files, etc. But once you install the handy utility called MediaInfo, even if you don't have the codecs installed, MediaInfo has the ability to read the Tags of almost all the multimedia container formats and display advanced information such as...


*. Playback duration.

*. Video/Audio codec names and - resolution/bitrate/fps/sample-rate/channels/language, etc.

*. Writing library - For instance, with this you can know the tool which was used to put the audio/video files into the container format.

*. Aspect ratio.

*. Compression mode - whether its lossey or lossless.

*. Chapters.

*. It support a huge list of codecs/containers such as MKV, OGM, AVI, DivX, WMV, QuickTime, Real, MPEG-1, MPEG-2, MPEG-4, DVD (VOB)... (Codecs: DivX, XviD, MSMPEG4, ASP, H.264, AVC...), OGG, MP3, WAV, RA, AC3, DTS, AAC, M4A, AU, AIFF... and subtitle formats such as SRT, SSA, ASS, SAMI..

Although these are few of its features... you can easily save all these information into a text or HTML format with it as well. It automatically integrates with Windows Explorer. So, whenever you want to see these information in a file, just right click on it and choose "MediaInfo" which should bring something similar as shown above.

You can try it out (its completely free) from this download page. To be honest, I haven't tried it in my GNU/Linux Laptop because unlike with Windows, it is a bit of a hassle to install and I don't think it integrate as well as with Windows either (supports 2000/XP/Vista and 7). Good luck.

How To Install Thunar File Manager In Ubuntu?

A file manager or the default file management utility is one of the most important aspects of a modern desktop environment. From things like running your entire desktop screen to managing files/folders... by having a well equipped and a stable file manager is certainly a necessity. Although I'm drifted towards GTK written applications but I certainly am not a huge fan of the default fm in Gnome called Nautilus.

For me it's too simple and I find it hard to "control". But still if you have an old GNU/Linux installed PC/Laptop then you might actually like applications that are "simple" because most of the time they have a tendency of being a bit merciful at your hardware resources (though, not always true). And with start of Gnome3, GNU/Linux distributions such as Fedora Core 15 is now asking for you to have at least 768MB of RAM.

So what I'm trying to say is that, if you love or "okay" (like me) with your Gnome 2+ desktop... but looking for a way to reduce some "weight" from the system as far as possible, then you could give a try another excellent file manager called Thunar!.


Thunar is actually the default fm for another more lightweight (that Gnome) desktop called XFCE. Since the goal of XFCE is try to use as low system resources as possible, the fm Thunar is especially written to help in achieving that. Although it may not make a huge difference concerting Nautilus, still it certainly uses lower amounts of resources nonetheless.


As you can see, Thunar has a very similar GUI to the Nautilus... in fact, they both actually are trying to "emulate" Mac OSX file manager. Anyhow, to be short and precise, almost anything that Nautilus can do, Thunar can do them as well...

... from deleting/creating folders to navigating using different views, expanding features via installing new plugins and generating previews of certain file types, etc ... it certainly is very powerful.

If you want to install Thunar in Ubuntu then open your Terminal and issue the below command.
sudo apt-get install thunar
Although this won't replace your Nautilus file manager and whenever you double click on any folder, it won't be opened using Thunar. If you want to replace Nautilus with it then,

1. Create a text file called = defaultthunar

and enter the below text into it and save it in your "Home" folder.
#!/bin/bash

## Originally written by aysiu from the Ubuntu Forums
## This is GPL'ed code
## So improve it and re-release it

## Define portion to make Thunar the default if that appears to be the appropriate action
makethunardefault()
{
## I went with --no-install-recommends because
## I didn't want to bring in a whole lot of junk,
## and Jaunty installs recommended packages by default.
echo -e "\nMaking sure Thunar is installed\n"
sudo apt-get update && sudo apt-get install thunar --no-install-recommends

## Does it make sense to change to the directory?
## Or should all the individual commands just reference the full path?
echo -e "\nChanging to application launcher directory\n"
cd /usr/share/applications
echo -e "\nMaking backup directory\n"

## Does it make sense to create an entire backup directory?
## Should each file just be backed up in place?
sudo mkdir nonautilusplease
echo -e "\nModifying folder handler launcher\n"
sudo cp nautilus-folder-handler.desktop nonautilusplease/

## Here I'm using two separate sed commands
## Is there a way to string them together to have one
## sed command make two replacements in a single file?
sudo sed -i -n 's/nautilus --no-desktop/thunar/g' nautilus-folder-handler.desktop
sudo sed -i -n 's/TryExec=nautilus/TryExec=thunar/g' nautilus-folder-handler.desktop
echo -e "\nModifying browser launcher\n"
sudo cp nautilus-browser.desktop nonautilusplease/
sudo sed -i -n 's/nautilus --no-desktop --browser/thunar/g' nautilus-browser.desktop
sudo sed -i -n 's/TryExec=nautilus/TryExec=thunar/g' nautilus-browser.desktop
echo -e "\nModifying computer icon launcher\n"
sudo cp nautilus-computer.desktop nonautilusplease/
sudo sed -i -n 's/nautilus --no-desktop/thunar/g' nautilus-computer.desktop
sudo sed -i -n 's/TryExec=nautilus/TryExec=thunar/g' nautilus-computer.desktop
echo -e "\nModifying home icon launcher\n"
sudo cp nautilus-home.desktop nonautilusplease/
sudo sed -i -n 's/nautilus --no-desktop/thunar/g' nautilus-home.desktop
sudo sed -i -n 's/TryExec=nautilus/TryExec=thunar/g' nautilus-home.desktop
echo -e "\nModifying general Nautilus launcher\n"
sudo cp nautilus.desktop nonautilusplease/
sudo sed -i -n 's/Exec=nautilus/Exec=thunar/g' nautilus.desktop

## This last bit I'm not sure should be included
## See, the only thing that doesn't change to the
## new Thunar default is clicking the files on the desktop,
## because Nautilus is managing the desktop (so technically
## it's not launching a new process when you double-click
## an icon there).
## So this kills the desktop management of icons completely
## Making the desktop pretty useless... would it be better
## to keep Nautilus there instead of nothing? Or go so far
## as to have Xfce manage the desktop in Gnome?
echo -e "\nChanging base Nautilus launcher\n"
sudo dpkg-divert --divert /usr/bin/nautilus.old --rename /usr/bin/nautilus && sudo ln -s /usr/bin/thunar /usr/bin/nautilus
echo -e "\nRemoving Nautilus as desktop manager\n"
killall nautilus
echo -e "\nThunar is now the default file manager. To return Nautilus to the default, run this script again.\n"
}

restorenautilusdefault()
{
echo -e "\nChanging to application launcher directory\n"
cd /usr/share/applications
echo -e "\nRestoring backup files\n"
sudo cp nonautilusplease/nautilus-folder-handler.desktop .
sudo cp nonautilusplease/nautilus-browser.desktop .
sudo cp nonautilusplease/nautilus-computer.desktop .
sudo cp nonautilusplease/nautilus-home.desktop .
sudo cp nonautilusplease/nautilus.desktop .
echo -e "\nRemoving backup folder\n"
sudo rm -r nonautilusplease
echo -e "\nRestoring Nautilus launcher\n"
sudo rm /usr/bin/nautilus && sudo dpkg-divert --rename --remove /usr/bin/nautilus
echo -e "\nMaking Nautilus manage the desktop again\n"
nautilus --no-default-window &

## The only change that isn't undone is the installation of Thunar
## Should Thunar be removed? Or just kept in?
## Don't want to load the script with too many questions?
}


## Make sure that we exit if any commands do not complete successfully.
## Thanks to nanotube for this little snippet of code from the early
## versions of UbuntuZilla
set -o errexit
trap 'echo "Previous command did not complete successfully. Exiting."' ERR


## This is the main code
## Is it necessary to put an elseif in here? Or is
## redundant, since the directory pretty much
## either exists or it doesn't?
## Is there a better way to keep track of whether
## the script has been run before?
if [[ -e /usr/share/applications/nonautilusplease ]]; then

restorenautilusdefault

else

makethunardefault

fi;

2. Then open your Terminal and enter the below command.
chmod +x defaultthunar
./defaultthunar
But remember, unlike with Nautilus, you could run into few "issues" while trying to preview/thumbnails on videos for instance (there could be a separate plug for that) in Thunar. In that case, if you want to restore Nautilus back, then use the below command. Good luck.
./defaultthunar 

Install gxmms2 in Ubuntu 11.04 Natty Narwhal - A GTK Written Music Player

In the past when Winamp used to dominate the audio players with its gorgeous GUI and features... few GNU/Linux enthusiasts created an audio player that has a very close look-n-feel to Winamp, which was called Xmms. It was a "hit" back in the day with GNU/Linux PC/Laptop users because it lets us manage/listen to your audio files with ease.

But then as the time went on, Xmms project got frozen and I think the reason could be due to the fact of a GUI that looks similar to Winamp, you know, it's not the "thing" the days anymore :). And also the original Xmms was written in the older version of the GNU/Toolkit called GTK and if you use Gnome 2 + and never versions, then not just Xmms, but anything that's written in that old GTK toolkit does not integrate well with the never "theme engine".

So as a result there are few other audio players that uses the Xmms as their engine but the GUI is written in never version of GTK toolkit which resulting in a better looking GUI. So, if you're one of those individuals who love Xmms but would like to have a bit never looking GUI written in GTK2+, then you "may" like the audio player called gxmms2.

gxmms2 is actually is not based on Xmms, in fact, it uses the Xmms2 as the engine, which is the new generation of the "old" Xmms player, built from the scratch.


From things like a playlist, search for files, manage Xmms2 media libraries, etc... gxmms2 is a "decent" player. If you use Ubuntu 11.04 Natty Narwhal or older versions then you can install it by entering the below command in your Terminal window.
sudo apt-get install gxmms2
But for those who's searching for a never look-n-feel, well, you may not like this that much :). 

They Weren't Kidding... Gnome OS is Underway!

Unlike with MS Windows or Mac OSX, even from the beginning GNU/Linux is (or "was" :) ) a somewhat "scattered" operating system. I mean, while a community of programmers design the Kernel others are busy building a desktop environment and lot of others are developing individual applications of their own which is something totally different from MS Windows, etc since all the parts of their operating system is being built by the same "people".

So basically, we don't have a KDE OS or a Gnome OS (not until now). We have distributions where group of individuals "collects" these Kernels and desktop designs (built using various toolkits such as Qt or GTK, etc) and various other applications such as office packages, multimedia utilities, etc and "merge" them together, the end result is a complete operating system.

Few months ago, Jon McCann (a serious Gnome contributor) started a little "buzz" within the community saying the need for an operating system which is developed/distributed/maintained directly by the Gnome developers!. It's called Gnome OS. He gave his "reasons" by saying few interesting things...
"We are dividing and conquering ourselves – lost before we begin.  Are we so hungry and desperate that we must devour each other in order to survive?  I hope not.  These tribal distribution boundaries are guarded jealously and they fight over the smallest (one) percentage of the market and mindshare.

I think it is time we reunite.

If we want to change the game, think big, and demonstrate that we can truly be relevant – we need to work together... we need to start at the source. We need to start with GNOME."
This is understandable from my personal experience actually. Because I come from a country where not that long ago two tribes fought viciously with each other, killing thousands of their fellow humans. When the war was going on, the people on those tribes worked together (within their tribe, of course). They were busy fighting the common enemy, thus there were less "space" for individual "greed".

The war was "ended" recently. Now we're busy building an economy, yet we find it easier to fight with everyone and it has nothing to do with what side you're in, anymore.

Back to the story....

Anyhow, when I first heard Jon talking about it for the first time, I actually didn't think it'll be developing at this "rate" :). For a start, now they have an OS whiteboard which describes various aspects of this Gnome OS such as ...

OS booting process and Login screen. 

The official booting logo is still developing at the moment, so there's nothing much to talk about right now. But they're planning on implementing a logo of their own using the Playmouth utility (an application that's written to display graphical logo/backgrounds at the early stage of the boot process).

They certainly won't be giving us a pure Black background by saying that...
"Background cannot be pure black (#000) due to the way monitors align video images. However, #080808 for example is OK."
By default it'll be running at a resolution of 800x600 in your Monitor.

Log-in Screen

They use GDM (it's actually John who's the current maintainer and the creator of GDM) for the log-in process... and they've released few screenshots of how it looks, well, it looks like Gnome3 :). See below picture.


At the moment it seems that we cannot change the Keyboard Layouts at this GDM log-in screen, but I think that will most definitely change.

A GTK3 Written installation Wizard

This is still at its very beginning. But again, looks good. For instance, I don't like that welcome screen which displays "Gnome3, it's here!", because it's been "here" for sometime now. So, hopefully it'll change. For a good OS installer... this Gnome OS wizard seems to have it all.

Starting with Hardware detection, disk partitioning to install/upgrade your system, it looks simple... but looks good. Again, without seeing it for real, it might be a mistake to praise much at this point :).

Have a look at the below screenshots to understand it better.

Click to enlarge...

Post OS installation...

Well, like with many other distributions, Gnome OS will also have a post OS installation wizard that would help you to setup things like your Clock/Regional settings, setup networks, create a fresh user account, etc.


It'll also come with a screen locking feature and an on screen keyboard as well.


If must, it'll Die with Dignity! ;-)

If it's confronted by "evil" and crashed the entire OS or a part of it, then Gnome OS will do its best to give the users the ability to file a decent bug report which would help programmers to understand about the technical attributes of the problem. They've "divided" the OS into five different layers, which would make it easy to file bug reports and enhance stability in general as well.

Here are the five main "layers" - Application, System, OS Shell, OS Core Services and the Kernel itself. According to the bug reporting whiteboard...
"In general, the handling of each type of trouble should be handled by the layer above it. Application problems should be handled by the Shell. Shell problems handled by Core Services (probably GDM or plymouth). And kernel failures by the boot system. And boot system failures by the firmware."
It has a simple bug reporting (GUI) tool, which again would change its "options" as time passes by.

OS Updates

This is one of the most important aspects of an operating system which helps to "patch" bugs and get latest features which again helps tremendously to fight against computer viruses/hacker attacks, etc. Again, the update wizard should be quite simple because I don't think most users even read if it consists of "all-technical" type attributes.


So, it should be informative, in a more intuitive way (you know, stimulating a little fear through our backs :D )  to the point of "forcing" the user (in a good way :P) to get the updates, if those updates are that serious. Anyway, it's too early to form an opinion about it... yet when considering its fast approach, heck, I think we should see its official release sooner that anyone would've expected it.

You can get updated information about it from this official Gnome OS-Design Whiteboards page.

Any thoughts about this Gnome OS??.

How to Install Decibel Audio Player in Ubuntu?

Decibel is another audio player for Gnome desktop what is written in GTK+ toolkit. It has a pretty simple interface, loads fast (one of its main key "features") and comes with decent amount of features too. Even after loading it with a huge list of files/albums... still it uses impressively lower PC resources, so it's a pretty powerful multimedia application for your GNU/Linux Laptop/PC nonetheless.

But as I've said before, the "catch" with Decibel is it's ability to run lightly on your hardware. For instance, while other known applications such as Amarok, Banshee and Exaile uses about 73/51/64MB of RAM while using, Decibel on the other hand uses about 28MB!.

Here are the other benchmarks I found while browsing their website.

Main features...

*. It's based on the Gstreamer multimedia framework, so anything Gstreamer plays, it can play (MP3, Vorbis, Flac, WAV, WMA, etc).

*. A fully featured Equalizer of its own.

*. Last.fm integration.


*. Album art/cover display support.

*. Simple and intuitive interface.

If you use Ubuntu 11.04 Natty Narwhal (should work in 10.10 and 10.04) then you can install Decibel by entering the below command in your Terminal.
sudo apt-get install decibel-audio-player

How To Setup K-Lite Media Player to Automatically Download Subtitles?

If you want to install almost all of known multimedia codecs in MS Windows via a single application, then I don't think there are that many who can beat K-lite codec pack!. Unlike many other codecs... K-Lite developers make sure to frequently update their codecs and release new versions frequently.

Not just for playback (decoding) actually, say that you also wanted to have their (both audio and video) encoders such as MP3, Vorbis, Xvid, Divx, etc then again K-lite is pretty darn good!. Although it does not have any GUI front-ends for encoding MP3, etc (it only installs the libraries of codecs that can be used to encode files)... still you don't have to search here and there for few dozens of codecs since K-Lite installs them by default.

Anyhow, back to the story. It even has a player of its own called Media player classic. Although this refers to the MS Windows which was used to be the "default" player around Win 2000 I think (they still ship it though) but K-Lite MPC is actually as nothing to do with MS, they've just create a player of their own (which uses the MPLayer as the engine) and is released under the GNU/GPL license, it just looks like MPC, that's all :).

Anyhow lets say that you have purchased a DVD and have Ripped it so it'd fit into a CD, which is legal :) (say 700MB in size) then wouldn't it be nice if you could let MPC automatically search and download the proper subtitle when you watch it??.

Well, you can easily search for its subtitle by from the main menu : "File" -> "Subtitle database" -> "Search". This will take you directly to Google and automatically enters the name of the file that you're playing as well.

But there is another option in MPC that's disable by default (see below screenshot), which can be used to automatically search an online subtitle database (won't open any web browser unlike with the above method) within the player itself, all you have to do is just put a "check" mark on the appropriate subtitle and it'll be automatically loaded into the movie which is totally awesome than the above method.

Sorry about the black screen , the "overlay Output" won't allow me to take image/screenshots :/


So how can we "enable" it?. 

Simple, just open the MPC (media player classic) and from the menu choose : "View" -> "Options"

.... and from the window you get after that, from your left go to: "Output".

Now as you can see below, by default, MPC uses the "Overlay Mixer". If we want to enable subtitle downloading in K-Lite/MPC then we have to choose either "VMR-7 (renderless)**" or "VMR-9 (renderless)**".


Note : I don't use Win 7 or Vista, but I think in those OSs you'll see few more options, but in all cases if you choose one of those above mentioned Output methods, it should just work in all MS Windows operating systems. 

So, simply click on one of those output options. For this example I choose "VMR-7 (renderless)**". Now click "OK" button and also close the MPC (it has to be restarted to enable the new video render).

Double click on the MPC again, play a movie that you have now you should be able to download the subtitle in MPC! (see below screenshot).


Once you click on "Download" button, you'll be greeted with a small window showing you available subtitles (different languages, etc). Select your language and then click on "Download & Open" button. That's it (depending on your film's FPC... some of these subtitles may not show subs at the proper timing, in that case, from the list, select something else).


Another thing, you have to rename the movie that you're playing to its true name because if the file name only has a portion of your Movie or something else (number, etc), then MPC will have troubles finding the subtitle, since it's your movie file name is what it uses to search for the subtitle online. Good luck.

Note: in some countries it's illegal to download ripped movies (unless they come from a vendor who has the privileges from the original creators) but if you have a legally purchased a DVD/Blueray disk, etc, then fear not, you can Rip it and make a backup, nonetheless.

Wanna Know How To Create an Off-line Multimedia Codec Pack Of Your Own in Ubuntu!

I've said this before but will say it again for the sake of completion of this article :P. I do have my problems with Ubuntu/Canonical concerning many things, but from a newbie point of view, Ubuntu does make it really easy to setup proprietary software installations in comparison with many other distributions such as Fedora Core for instance.

Although, I personally don't like Ubuntu much these days... it threatens a part of my "identity", yet if you like it nonetheless, and looking for a way to create an off-line codecs pack of your own... then this article is for you.

I did post about a codecs pack, concerning Ubuntu 10.10, but it won't work under Ubuntu 11.04. I tried to find one of Natty Narwhal but... still... nothing, nada. So I thought, *$ck it, gonna create something of me own :P.

Apt-Get....

This is one of the most advanced/robust package handling utilities available for GNU/Linux, which was invented by the Debian team if I'm not mistaken. Although other distributions have few of their own ones such as the "yum" package manager in FC, but even in the early days of "yum", apt-get was so much, impressively superior because it has been there for a long time.

With apt-get, we can install/upgrade/delete... we can do almost anything with it concerning software installations under Ubuntu/Debian or any distro that comes with it. So, for this I'll be using this well knows apt-get geeky tool :).

Enough talking, lets gets busy.

When we use apt-get to install software in your GNU/Linux PC/Laptop, by default it saves a copy of the downloaded software in its directory which is called "apt-get cache".

Because of this cache folder then say that for some reason you removed a software called "A"... but later you wanted to re-install it again, then apt-get will not re-download it again (unless there are updates/new versions, etc), it would just use that saved cache.

So, that's basically what we're gonna do. We'll simply install all the multimedia codecs in Ubuntu (should work on any Ubuntu version from 9.10 and onwards), and then we'll copy those cached .deb packages to our own folder.

Then in the same PC or any other PC/Laptop that runs Ubuntu (it must run the same Ubuntu version as the one you created this codec pack), we just have to give the package manager the path to our cached folder with all those codecs and it'll install them all without the need of an Internet connection!.

Pretty simple, right? :).

Especial Note:- For this, please use your Ubuntu Live CD, because once you install software in Ubuntu, some of the dependencies may not be downloaded which are required for this codec pack. 

So boot using your Live CD into a PC where an Internet connection is available. And make sure not to install any other software prior to logging into your Live CD's Desktop.

Or an PC/Laptop with newly install Ubuntu OS will be the perfect "situation" since, if you don't have enough RAM, etc while using the Live CD, it could be a bit troublesome.

Lets do it!.

1. First we have to clear the current database of apt-get. Although this won't be necessary since this is will be our first software installation using the Live CD, but lets do it, just in case :)

So open your Terminal and issue the below command.
sudo apt-get clean

2. Now enter the below command in your Terminal again to install a full list of codecs (including adobe flash, etc).
sudo apt-get install ubuntu-restricted-extras


3. Although this codec pack has almost everything, except it won't have the abiliy to read encrypted dvds. So lets download that as well. To do that, open your Terminal and issue the below commands.

sudo apt-get install libdvdread4

4. Once the downloading is complete go to apt-get's cache location as shown below.
/var/cache/apt/archives
Now press "Ctrl" + "A" keys on your keyboard to select everything on that folder, except for the folder called "partial" and a file called "lock".

5. Then copy and paste all these packages to a desired location. Lets say you created a folder called "multimedia codecs" in your Desktop for this example. Then paste the copied content into that folder.

6. Now copy that folder to anywhere you want, a CD or a USB drive, etc.

7. From now on, whenever you want to install these codecs in another Ubuntu installed PC, simply open your Terminal in that PC and enter the below command.
sudo synaptic

8. This will open a GUI package manager for apt-get (called Synaptic).

Once opened, from the menu chose: "File" -> "Add downloaded packages" (see below screenshot)... then simply open the folder that contains the multimedia codecs and click "open"... then Synaptic will ask to conform the installation. So follow your on screen instructions.


9. And also make sure to open a Terminal afterward and enter the below command as well.
sudo /usr/share/doc/libdvdread4/install-css.sh

Ahhh... man I'm tired :). So, that's how you create an off-line codec pack in Ubuntu.

Remember, always use a Live CD or a freshly installed Ubuntu OS and for this method. Also make sure that PC (you're gonna install these codecs) Ubuntu version matches the version of that Live CD you used to create it in the first place. For instance, if you used the latest Ubuntu 11.04 Natty Narwhal, then you should only use this on 11.04 Natty Narwhal.

And since it's bloody hard to remember things :P, you can create a text file within the "Multimedia codecs" folder and paste that above command into it ("sudo /usr/share/doc/libdvdread4/install-css.sh") since it's necessary to enter that command every time you install this codecs in a PC/Laptop for the first time.

Good luck guys and gals :).

Install Sunflower in Ubuntu 11.04 Natty Narwhal (Simple File Manager for GNU/Linux)

One of the great things about GNU/Linux is that, despite all these difference... is its ability to give a huge "list" of options/solutions for the users. For instance, if you don't like an application then you can easily find another one that does it better, which is also true for all the other major operating systems as well.

But with MS Windows or Mac OSX, if you're not happy with the way of the desktop and its behavior... then there's nothing you can do about it, other than hoping that they'll fix those issues in a future release.

But the great thing about GNU/Linux is that, say for some reason you don't like Gnome or KDE... then you can find a desktop that suits your needs such as the light weight XFCE or LXDE, etc. Or, if you don't like anything with a GUI, then you can go completely command-line as well :P.

In that sense, if you're not that happy with your current file manager looking a powerful file manager that easily integrates with GTK written Gnome desktop.... with a "twin-type"/view, then Sunflower is a pretty cool app.

Simple, yet, powerful!...

For instance, in the recent past, Nautilus file manager used to have an option where it lets you open your Terminal in a given folder/directory which is very useful if you have to run a script, etc within a folder (deep down in the "root" :P). Although you may find a Nautilus script which would add the option, still I'd prefer it Nautilus came with something like that by default.

But our little Sunflower comes with a toolbar using that, you can easily open a terminal in a give folder via a single click!. + as with Nautilus it also comes with a built-in plugin support using which we can "expand" its functionality. Although to be honest, this is certainly not a replacement for Nautilus, but still sometimes, it can be quite handy nonetheless.

Few other main features...

*. Synchronize directories.

*. Find files.

*. Advance renaming.

*. Select files with the same extension (another handy feature).

*. Compare directories, etc.

It runs in Ubuntu 11.04 Natty Narwhal without any issues and I think it should work in the older versions such as 10.10/10.04 as well. It's written in Python and can be easily run in other OS too.

If you want to install Sunflower file manager in Ubuntu, then first download the latest package from here. Extract the content and go to that folder in your Terminal and enter the below command.
./Sunflower.py

Or, simply double click on the "Sunflower.py" file in Nautilus and when asked, choose "run".

If you're really interested in it, then it can be a bit of a pain to always run it through these methods. In that case, lets create a shortcut by using which you can simply run it by double clicking as usual.

1. Right click on your Desktop and choose "Create Launcher".

2. Now when asked, enter a desired name (you can enter anything that you like), for this example I used the same name "Sunflower".

Under the option "Command", simply go to the extracted folder and select "Sunflower.py" file and click "Open" (see the below screenshot).


3. If you want to change the icon to the default on that comes with this file manager, then click on the icon button on that launcher window and again go to the extracted folder and locate a directory named "images" and choose the icon that you like.

That's it. Now you should have a shortcut created for Sunflower file manager in Ubuntu 11.04 Natty!. Enjoy.

Oh and one last thing. When you open a Terminal in SF, there aren't any button provided for closing the opened Terminal. So, just enter the below command within the Terminal window and it'll close automatically.
exit

Ambiance Evolution - Another "Customized" GTK2 Theme for Ubuntu Unity!

Okay, this is another theme that's based on the already existing Ambiance theme (created by the Ubuntu developers) in Ubuntu Linux. Although as far as I know, most GTK2 themes should work in Unity desktop despite the "visual" differences between Gnome classical desktop and Unity.

So you should be able to use this in Gnome desktop in Natty Narwhal as well. Anyhow, the main difference in this theme comparing with the original Ambiance (heck, there's even a Gnome3 theme as well!) is the lack of borders which makes it looks awesome btw :).

Other than that, it also has darkened tool-bars, better looking buttons, smooth transition between tool bars and title bars, enhanced/new sliders are among few of its main features.


Enough bragging Gayan!. Where can I get it?

Parley... :). Okay, um, first download the zip package from here. Then extract the content to ./themes folder in your Home.

If you don't have Nautilus elementary installed, then it is advised to edit the "gtk-2.0" file in this Ambiance theme (use your text editor) and delete the line which says " include "nautilus-elementary.rc" " which can be found at the end of the file.

If you want more information, then I recommend visiting simplegreat, the artist who created this awesome theme.

Miro 4 Is Released, How To Install it in Ubuntu 11.04 Natty Narwhal?

Miro is one of the best open-source media player applications that is available for lots of different types of platforms such as GNU/Linux, MS Windows and Mac OSX. Not just the gorgeous looking GUI but with Miro you can even convert multimedia files with ease as well.

Although I've written about it in the past (when it was at 3.6 version) but according to the developers themselves you should consider upgrading to the latest version (4) since it brigs major improvements/features when considering its predecessors.

Few of the noticeable "enhancements"...

*. Sync multimedia files with Android devices.

*. Android and Amazon MP3 store support.

*. Unity's appindicator integration.

*. Share files in any PC/Laptop that has Miro installed (over the network as well) - DHT support.

*. Shuffle/Repeat playback options.


*. Watched/unwatched "filter" for video feeds.

*. New volume slider (only for Mac OSX).

*. Important media option added.

These are just a few of the main features to mention. So, if you want to install the Miro version 4 in Ubuntu 11.04 Natty Narwhal, then open your Terminal and enter the below command.
sudo add-apt-repository ppa:pcf/miro-releases
sudo apt-get update
sudo apt-get install miro

Does Skype Keep Aborting After Logging in (Under GNU/Linux)?

Although I don't use Skype at all yet there have been a bit of a discussion especially concerning Skype 2.2.0.25 keep crashing (although many refer to its as a crash, it seems what really happens is that it simply being aborted within the console) under GNU/Linux, MS Windows and even on Mac OSX as well.

Even Skype developers themselves quoted concerning the issue by saying...
"A small number of you may have had problems signing in to Skype. This predominantly affects people using Skype for Windows. We have identified the problem and will issue a fix in the next few hours."  

Source: Skype (read this for instructions on how to fix it under all the operating systems, until they officially fix it).
So in GNU/Linux this is what seems to be happening. Once you log-in to their VOIP servers using your user name and password... then within like 5-6 seconds Skype automatically log-out/exist it self automatically!. For some, a re-installation seems to be the answer but for most it will not fix it.

What the Skype! :)...


But luckily, there is a way to fix this which I saw when reading this ask Ubuntu post. So, until the developers fix this annoying bug, if you use Ubuntu or any other GNU/Linux distribution and experiencing this "tragic" :) issue, then this is how you can fix it.

Open your Terminal and enter the below command.
rm ~/.Skype/shared.xml
Now re-login to your online Skype VOIP account... if everything went well, it should be fixed. 

1. Okay, for the sake of completion :)... under MS Windows, simply delete the below file.
c:\Documents and Settings\*user*\Application Data\Skype\shared.xml
2. In Mac OSX, use the below command.
rm ~/Library/Application\ Support/Skype/shared.xml